Wednesday, April 29, 2015

Make your own drop spindle

Drop spindle, side view

An inexpensive tool for spinning

Always wanted to try spinning but don't have a spinning wheel? Why not try a drop spindle

Early tools for spinning fiber, drop spindles continue to be used by many spinners in many cultures around the world today. They're portable and inexpensive and if storage is a challenge, they are very space efficient.

Although plenty of modern spinners flat out prefer the drop spindle for spinning, many wheel spinners value them for their portability. Drop spindles travel well. As for the yarn, some spinners favor them for spinning fine yarns. 

There are many drop spindles on the market today. They come in a wide range of materials and prices ranging from simple and inexpensive to beautiful handcrafted treasures. But because I'm often somewhat reluctant to invest in a new fiber tool until I think I'm going to like the craft, I suspect many others may also be.  

One way to find out if you'll like drop spinning is to make your own. The materials are inexpensive and readily available. Assembly is easy--only a few steps to a fully functioning drop spindle. 

I have one that was part of the welcome packet at North Country Spinners Fibre Fallout 2014. With full credit to the clever North Country Spinners who created this particular DIY drop spindle, it is simple enough for some reverse engineering. 

Materials:

  • Two (2) CDs or DVDs (Used or new)
  • One dowel, 3/8" diameter, cut to a 12 inch length.
  • Fine grit sandpaper
  • A rubber or vinyl gasket, 3/8 inch interior size to accommodate the dowel and fit the hole in the CD/DVD snugly
  • A cup hook, 1/2 inch size
  • An abrasion tool, such as a Dremel tool, to make a small half-round notch on the CD/DVDs.

Assembly

  1. Lightly sand the cut ends and sides of the dowel to remove any rough edges.
  2. Screw the cup hook into the center of one end of the dowel. 
  3. Stack the two CDs/DVDs together.
  4. Fit the rubber gasket into the hole in the CD/DVDs, making sure that the CD/DVDs fit into the gasket's grooves. 
  5. Fit the dowel through the gasket's center hole. This should be a snug fit. My spindle's dowel extends slightly less than 1/4" above the gasket to the cup hook .
  6. Make a small, smooth half-round notch with an abrasion tool. (See notch at right, below)
    Drop spindle: Note the half-round notch at the bottom 
Drop spindle, closeup of fittings and hook

Voila! Now you have a drop spindle and you're ready to spin. What next? 

Ideally, find a spinner who can drop spindle or visit a drop spinning demonstration. Spinners are keen to share their love and frequently demonstrate at fiber shows around the country. Guilds such as the South Jersey Guild of Spinners and Weavers and the North Country Spinners are good resources and often participate in local festivals to demonstrate and teach their craft. 

Not in the area? Find a local guild or check out your local yarn shop for direction. If all else fails, there are a number of videos online such as the YouTube video produced by Paradise Fibers.

Happy drop spinning!

Thursday, April 23, 2015

A few of my favorite knitting tools

Management tools for threads and needles.

We all have our favorite tools for working. I always enjoy hearing about others' favorites, so I thought I'd start by sharing mine--and hope that you will share yours.


Stitch fixes

Knitting machine hook
This little tool at right has been my very favorite hand knitting sidekick for many years. It's a knitting machine tool but the hook end (seen here on the left) is perfect for picking up and manipulating stitches! No bigger than a small crochet hook, it's much more efficient in grabbing miscreant stitches in yarns of nearly all sizes.

I've wondered what I'd do should I lose it, but I am relieved to find options. I found quite a few listed on eBay--all tagged as for knitting machines. Perfect. I also found some other hooks with handles that would probably work well. 

Fix-a-stitch tool
Speaking of picking up dropped stitches, a tool made specifically for picking up pattern stitches beyond stockinette is the Fix-a-Stitch tool. I first saw it at Vogue Knitting Live in New York a couple of years ago and was impressed with the demo. I bought it and keep it in my tool box, but must confess that while I find the design brilliant, I'm not as impressed with the function or feel of the plastic hooks. If I loved them, I wouldn't begrudge the retail cost, which is about $15 for a set of three. (The manufacturing cost must be pennies.) I just wish the material were a little higher quality.
Protective wrap for yarn cake


Cake control

My freebie favorite is for yarn cakes, especially those where the outside end constantly seeks to mate with the working thread, which feeds from the middle of the cake. I've tried to control this with small plastic bags and project bags, but nothing controls the ends like protective wraps such as those used on produce and fruit for protection from bruising. Check the local produce aisle!


Double pointed needle management

I mostly knit with interchangeable circular needles, but still need double pointed needles for some projects. However, they have driven me crazy over the years. They're hard to store and almost always need a needle gauge before using. I've tried fabric cases and the two-part needle holder tubes for sock knitting. Both solutions helped manage the inherent needle messiness, but were less than perfect. 

After seeing a tweet about the recently released double pointed knitting (dpn) needle sorter and gauge tool from HandworkhardwareI jumped online to order one. I was not disappointed. IMHO, it is a triumph of design. The round cardboard storage container with screw-on lid includes a knitting needle gauge and sorter for small double pointed knitting needles (US 000-5/Metric 1.5-3.75mm). It's easy to put away needles and easy to retrieve them. And it provides space efficient storage.

Handworkhardware container
Here's how it works: The flat gauge on the top of the red plastic needle holder (just barely visible at right) is a knitting needle gauge tool. When putting away dpns, you drop the needles through the gauge hole to the storage section below for storage in pie-shaped sections. 

When ready to knit, pull up the internal storage unit to retrieve the needles you want to use. The unit doesn't come all the way out, so the needles don't fall out. They just gracefully 'flower' and enable you to select the ones you want. (The photo on their website shows the entire unit in more detail.)

Do you have a favorite knitting tool? Please share!


Monday, April 20, 2015

Fisher knitwear

Michael Pearson's Traditional Knitting
Like most textile arts, knitting was not historically an art form. It was a practical craft. In the British Isles, knitting sweaters, commonly known as ganseys, was what people did to clothe themselves and often to make a few shillings on the side. The knits for fishermen provided warmth in harsh environments, but they also were palettes for creative and talented knitters. 


Traditional patterns often passed from mother to daughter, but were rarely written down. Almost certainly, some of this history has already been lost. We can thank Michael Pearson for helping to preserve the history. And now, we can thank Dover Publications for reissuing an expanded edition of Michael Pearson’s Traditional Knitting, Aran, Fair Isle & Fisher Ganseys, which was first published in 1984. 

This book is a classic and of interest to anyone interested in knitting for the author includes not only historical perspectives and photographs, but tips and patterns for the modern day knitter.


Pearson considers the origins of the name ‘gansey,’ as well as the patterns used. Where did they originate? Can you identify the village or family by the pattern, as is often claimed? Some of these questions can be answered straightaway, but many must be assigned to the category of ‘probability.’

One at a time

It was almost too late when Pearson embarked upon his project to find and document knitwear in fishing villages and communities in Great Britain. In some cases, he was too late, in which case he relied on those who preceded him as well as some collections and  local museums. The knitters he met were like most knitters today--gracious and eager to share. He only had one instance of refusal.

Compiled from personal interviews with knitters and their descendants in fishing villages around the coast of Great Britain, Pearson documents a history of personal and contract knitting among coastal fisher families in the British Isles. Knitters will find a wealth of inspiration and patterns. 

The southern English fisher ganseys show many beautiful patterns in variations of knit and purl, but when Pearson gets to Scotland, he is awed. He says, “the Scottish knitters were more creative and adventurous and their patterns much more exciting. It seems there has been little or no influence northwards from England.”

Practical tips and how-to’s

In addition to history, Pearson provides complete patterns along with knitting tips and how-to’s throughout the text. For example, to resolve a common problem of an unsightly column of stitches where the knitter changes needles in knitting in the round, he advises varying the crossover point to even the tension. 
"Never, ever sew when you can knit." (Quote from one interviewed knitter.) 

After reading the section of Fair Isle knitting, I'm ready to discard my pseudo-‘Fair Isle’ sweater, which is far from the traditional style. The photographs in this section are particularly beautiful, showing examples of the patterns within patterns and vivid color work. I particularly liked the color photograph of Fair Isle knit in the varying natural shades of Shetland ranging from the darkest brown to Shetland white.

I really enjoyed reading this book and now need to find a place for it on my reference shelf. It’s that good.

Tuesday, April 14, 2015

A braiding circle

Some examples of kumihimo braids
I spent a most delightful afternoon last weekend with the Princeton Embroiderers Guild, where I led a workshop on kumihimo, aka Japanese braiding. The afternoon was a highlight all around. A great group of individuals interested in threads. I had a grand time and was especially pleased that everybody left with a braid. 

Let me back up a bit because I haven't really talked about kumihimo in this blog. Kumihimo, pronounced just like it sounds--koo-me-he-mo, is a Japanese braiding technique. Until the middle of the last century, braid making was controlled by Braiding Houses who jealously guarded their craft. 

The craft and diagrams only entered the public domain with collapse of the handmade braid market. Not only did few women need obi-jime for their kimonos, which had fallen from fashion, but machines could make braids much cheaper. Not better, mind you. Just cheaper. Facing imminent financial ruin, some of the Houses opened their doors to students.  

Marudai w/16 bobbins

Beyond kimonos and swords

Kumihimo braids are beautiful and the braiding process, rhythmic and somewhat meditative. The soft clink-clunk is a soothing sound as the hands move the bobbins across the face of the marudai and drop them into position. I liken it to spinning.

The craft appealed to me from my first introduction in my coursework for the the City and Guilds 'Creative Textiles' program at the London College of Furniture, now part of London Metropolitan UniversityThe two year program was selective, meaning that acceptance was based on submission of a portfolio and a personal interview, but it was excellent, providing deep immersion into a variety of design and craft skills. Final projects focused on two or three specialties. Mine were weaving, knitting and kumihimo. 


Braiding on the disk
Kumihimo braids can be square, round, flat, or even hollow. Traditionally worked on a marudai, or braiding stool, kumihimo braids made in the traditional way use weighted bobbins and counterweights to control tension on the braid. M. handcrafted my classic marudai, seen above at right with 16 bobbins.


Two braiders at work in Princeton
While pleasant and peaceful to braid on a marudai, not everyone has one. Most of us start on a disk. Disks made for the purpose are readily available these days, and that's what we used at the weekend workshop. 


What's the use? 

Tying off the completed braid
Since you probably don't need an obi-jime to fasten your obi or to fit out your sword, let's dispense with that train of thought. Kumihimo braids may be beautiful in their own right, but they are exceedingly useful. Jewelry is one common use, but be sure to consider using them as edgings, buttonholes, earrings, closures, and finishes. 

Put your creative mind in gear and share with me what you're doing with them. I'd love to know!


Tuesday, April 7, 2015

Button, button

One way to avoid the 'homemade' tag

Espresso sweater
So, you've finished knitting something--a garment, accessory, table linen, whatever--and you heave a sigh of relief. You've spent dollars on the yarn and many hours planning and executing the project. And you're proud of it. BUT....it's rarely really and truly done.

You haven't finished it until, well, you've finished it. Those thread ends must be woven in, the  pieces seamed together and the edges finished--all the things that take it from the needles or the loom to a usable item. 

Shortcut the finishing processes at your own peril. No serious handcrafter wants to produce an item that screams 'homemade.' Although 'homemade' works well with jam and pies, it's a killer on handcrafted fiber items. Synonymous with second-rate and poor skills, it degrades the work. 

The importance of attention to detail in finishing simply can't be emphasized enough. It is often the difference between 'homemade' and 'custom made.' 
I recently received a high compliment from a knitting maestro who admired the sweater I was wearing and remarked, 'You could make that.' It was particularly sweet to reply, 'I did.'
Although every single decision--color, creativity, technique, etc.--a skilled fiber artist makes in producing an item contributes to the final product, finishing details are frequently the thing that  separates a 'homemade' look from the far more desirable 'custom,' 'designer,' or 'one-of-a-kind.'

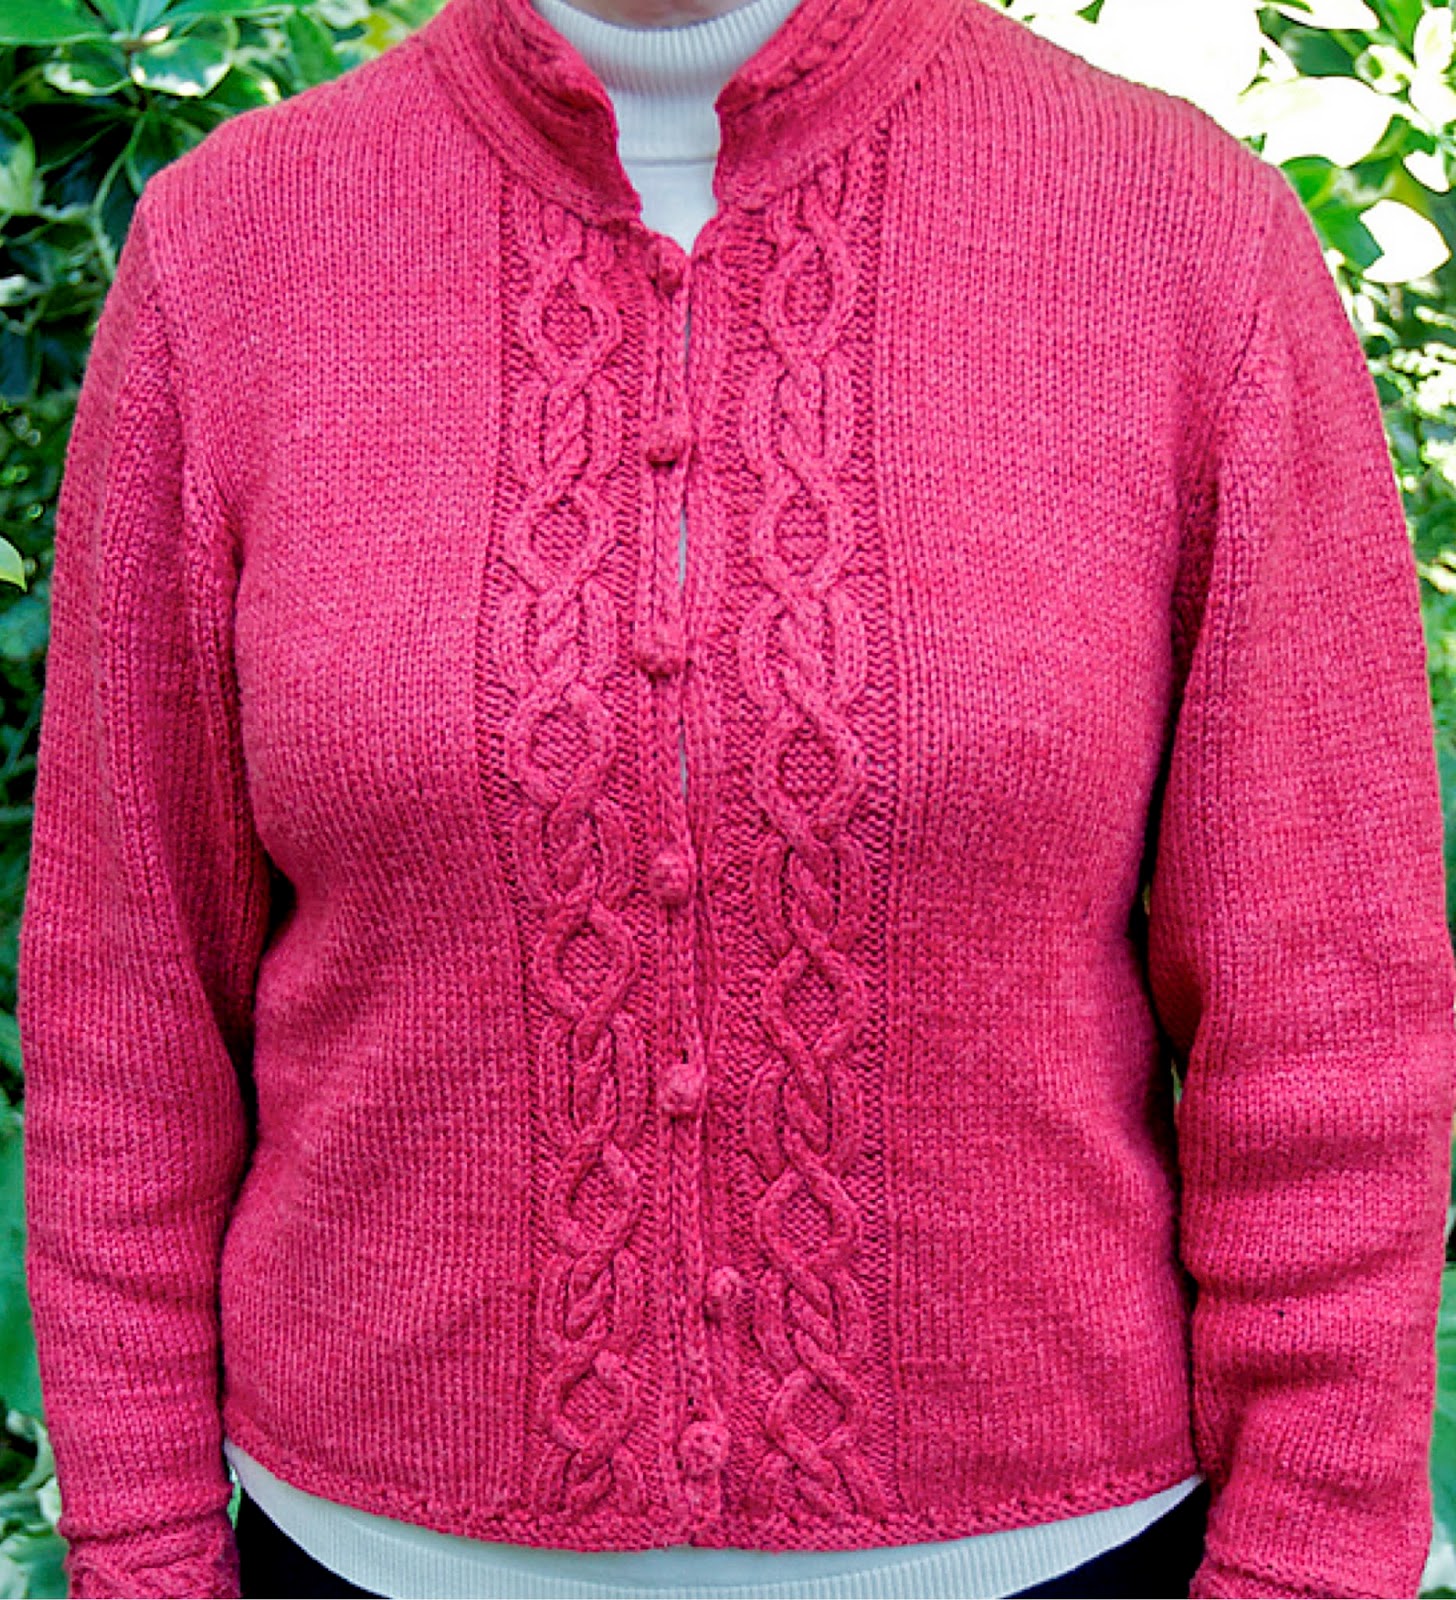
Several years ago, I knit a sweater from Lisa Lloyd's Espresso sweater patternI rarely follow a pattern exactly, so it's no surprise that as I compare the original with mine as posted on ravelry, there are visible departures from her well-designed pattern. My changes were largely restricted to the edgings and finishing.

Since posting the photo, the buttons have garnered the most comments. The very simple directions for making the buttons are in the note section of on my ravelry project page, but I'm posting them here, as well, along with some additional thoughts on buttons.

Buttons: A closure or the focal point?

Dorset button
The distinction is important. Sometimes, you want to show off the button...and sometimes, not. Most often I want a button that complements, but doesn't distract. I want the focus on the garment. Usually, I make buttons from the same yarn as my garment. 

Probably the most commonly known handmade button is the Dorset button, which is worked over a plastic or metal ring. I rarely use this style as it's a rather large button when worked over most available rings. Sure, smaller rings are an option, but I find them  tedious and unless using very fine yarn, the resulting button can look unprofessional.

Espresso sweater, buttons
Most often I crochet buttons using the same yarn that was used to make the garment. Whether I make them using a button as a base depends solely on the yarn and the garment. Crocheting a button over a button with a shank and in a color that won't shout through the cover makes a button with a solid feel. 

The Espresso sweater buttons, shown at left, do not have a button base. They are roundish, soft and pliable. I first made the buttons over a button base, but didn't like the look, so I removed the button to achieve a softer look. Directions for both versions are below.

(You may also note that the finished edges on this sweater differ from the original pattern. The sleeve edges are finished in one row of single crochet and the front edges with multiple rows of Bosnian crochet, incorporating loops to accommodate the crocheted buttons on the right front.)

Ready to make your own buttons? Here's my very simple approach:


Directions for round crocheted buttons

[To make a button with a solid button base, you will need 3/8 inch shanked buttons, domed with a flat base]

Using a small crochet hook, appropriate for the yarn you are working with:
  • Make an overhand circle without a knot
  • Make 5 *SC in circle, ensuring that overhand is secure. Pull up to tighten.
  • Make 2 SC in the back of each of the 5 sts in prior row
  • Make 1 SC in the back of each of the 10 sts in prior row
  • Pick up 2 sts from back (1st from front, 2nd from back; crossed sts) and slip stitch to securely close.
[If using a button base, insert button and slip stitch to securely enclose the button.]

*SC, single crochet