Showing posts with label weaving. Show all posts

Thursday, September 23, 2021

Deflected Doubleweave Shawl

I spent a lot of last year's pandemic down time working through designing and sampling deflected double weave (DDW) patterns, using Marian Stubenitsky's book, Double with a Twist as a jump-off. 

If you haven't played with DDW, it is fun and it can be
just the challenge you never knew you needed. The basic structure is simple enough--a two layer cloth, double weave. But the layers interlock moving from bottom to top layer and top to bottom to form the pattern. And, of course, the more shafts you have, the more intricate and interesting the possibilities.

I wanted to add interest, so decided to design a shawl, which is really just a flat rectangle. And I wanted it to have three different designs--side border, end borders, and the center--that would flow from one to the other without seamlessly. Texture was also important. I wanted one layer to shrink more than the other.  

I have 16 shafts on my AVL, but I like to reserve four for selvages and typically use up to 12.


Sampling was essential, and I learned a lot about the yarn behavior and DDW in the process. I made many, many samples.  


All these samples... and many more --- were invaluable

The final design was courtesy of a threading error on a sample. I had threaded eight shafts instead of 12 in one section, and loved the effect. 

Time spent planning the shawl was worth every minute when weaving got underway. Weaving is slow with DDW, but that's really the only drawback. 

I used four yarns, two in each layer. Yes. Four shuttles. One layer was a dark navy silk noil and black merino wool. The other, used two different gold colors, both merino wools.

I planned for shrinkage--and I got it. Shrinkage was a significant 25 percent. 

Friday, December 22, 2017

Rug abuse

Rug: Wool w/linen warp
Charlene Marietti

I confess. I abused a rug. It went like this.

I put a linen warp on my Harrisville rug loom, wove about two-thirds of the planned length, then stopped. I didn't mean to stop. Life got in the way. Specifically, a full time job. When I got home at night, I really had little creativity and little to no energy.

The partially woven rug sat on the loom. It sat a long time. Years. 

When personal time opened up and I had cleared the clutter and reclaimed my work space, I uncovered the rug. I wrote it off. It had sat too long. I would cut it off and start a new one. 

But when I sat down, scissors in hand, to cut off the rug, I found that the warp was as good as when it was put on. What? How could that be?

Now if you've ever woven with a linen warp, you know that linen is not very friendly. Try as I might, every linen warp I have ever put on had some slush. It seems inevitable despite dozens of warping sticks. And when the tension is even a little bit off, the warp shows it. Except with this loom.

My loom is a Harrisville rug loom with shaft-switching device is a fantastic loom, but in this case the winner for utility goes to the warp extender. Functioning as a second beam, the warp extender overcomes the tension problem because once the warp is threaded and tied on in the front, there is no need to unwind the warp from the back beam. 

A vertical solution to weaving on a warp that is stationary, that is, not wound on a back beam or equivalent, the warp extender can be raised nearly to the top of the loom, allowing the weaver to put up to seven feet of warp under tension and not worry about changing tension with the advancing warp. 

Does the innovation belong to Peter Collingswood? Maybe. An early 1990's technical preview of the Harrisville Rug Loom notes as a special feature, "The new TENSION EQUALIZER is an innovative mechanism that Peter Collingswood incorporated into his own looms."

Instead of unwinding the back beam, the weaver advances the warp on the warp extender by lowering it. Couldn't be easier. And now I can report that the warp extender saved a rug. 

I wove that rug to the end and finished it with a Taniko edge. What do you think?

Tuesday, November 7, 2017

Just plain tabby

Plain weave w/three types of thread

Tabby? Really?

I wasn't very excited about the focus for the upcoming workshop and sample exchange, so I hadn't signed up. But I changed my mind--and am so glad I did.

The backstory: To complement its March 2018 program, Hands-On Workshop: “Plain Weave Isn't Plain Anymore,” the New York Guild of Handweavers set up a sample exchange. Again, plain weave, aka tabby, which can be woven on any type of loom, including a rigid heddle.

If you've never participated in a sample exchange, it works like this. Sometimes there is a theme--in this case, it's plain/tabby weave--but not always. Each participant weaves and prepares a sample and documentation of relevant details--fiber, sett, finish, etc.--for as many people as are in the group. At the exchange, weavers share samples and experiences . 

These exchanges are an excellent learning tool and provide resources for years to come and I like to participate whenever I can. In this case, I wasn't the only one slow to the gate. At the meeting time, only a few had committed to the project.

I admit that a guilt feeling figured in my change of mind, but the more I thought about it, the more I realized it would be a good exercise. I'd been wanting to do some exploration in structures such as collapse weave, which uses various types and sizes of fibers to achieve variation in texture. I'd also been thinking about incorporating my handspun into weaving, so that was a 'maybe.' And I imposed one more rule on myself: I had to do it from stash.

My mind went into overdrive.

The playground

First I did a wrapping, as I usually do when combining colors in a warp. Wrappings don't provide full information on the interplay of colors as there is no accounting for the color effects for the weft, but they're a quick and simple starting point. (I like to play with weft colors with the warp on the loom so usually add an extra foot or so to the warp length of that purpose.) 
Color wrapping, sampling balance left to right

For this exercise, I decided to build the color warp around a two-ply Coopworth handspun yarn hand-dyed a dark red with brown tones and color variation. The yarn wouldn't win any prizes in a skein competition, but the variation and slight differences are interesting.

First I tried the lavender rayon with the handspun, as at the left of the wrapping. Yuk.

Then I wrapped a fine two-ply (2/20?) dark cranberry yarn and added a gray rayon thread used for machine embroidery. (Please don't ask how it happens to be in my stash. I don't know. I don't do machine embroidery.)

By the time my wrapping reached the right side of the cardboard strip, I liked where I was headed . So I warped up my loom with the three very different threads. Different weights. Different textures. Different twists. Different spacings.

And I started weaving with two shuttles, one carrying the cranberry yarn and the other, the gray rayon thread. 

I was delighted with the outcome after just a few inches of weft. It was such fun playing with thread watching the changing effects. What better fun can there be?

Tuesday, August 22, 2017

Weaving and catching up

Echo weave samples, L. Hartshorn

Better late than never

I focused a great deal on the MidAtlantic Fiber Association (MAFA) biennial conference before the event, but dropped the ball in following up. That had nothing to do with the event and everything to do with me. Lots of catching up--and lots to prepare for the fall shows. 

Polychrome turned taqueté samples, L. Hartshorn
First, the MAFA conference was outstanding from opening evening with Madelyn Van Der Hoogt's keynote to the very last lunch. Yes, the hot weather created some challenges, but I remember the days of no air conditioning. It was nothing humans haven't been coping with for eons.

Second, my workshop was excellent.
Complex doubleweave samples, L. Hartshorn

Networks in weaving

During the time I was away from weaving, network drafting, echo twills, and taqueté techniques entered the weaving vocabulary. I had read the seminal book on the subject, Alice Schlein's Network Drafting: An Introduction, as well as Marian Stubenitsky's Weaving with Echo and Iris, but wanted more insight and some hand's on experience. Linda Hartshorn's workshop, Weaving in a Parallel Universe, delivered both.

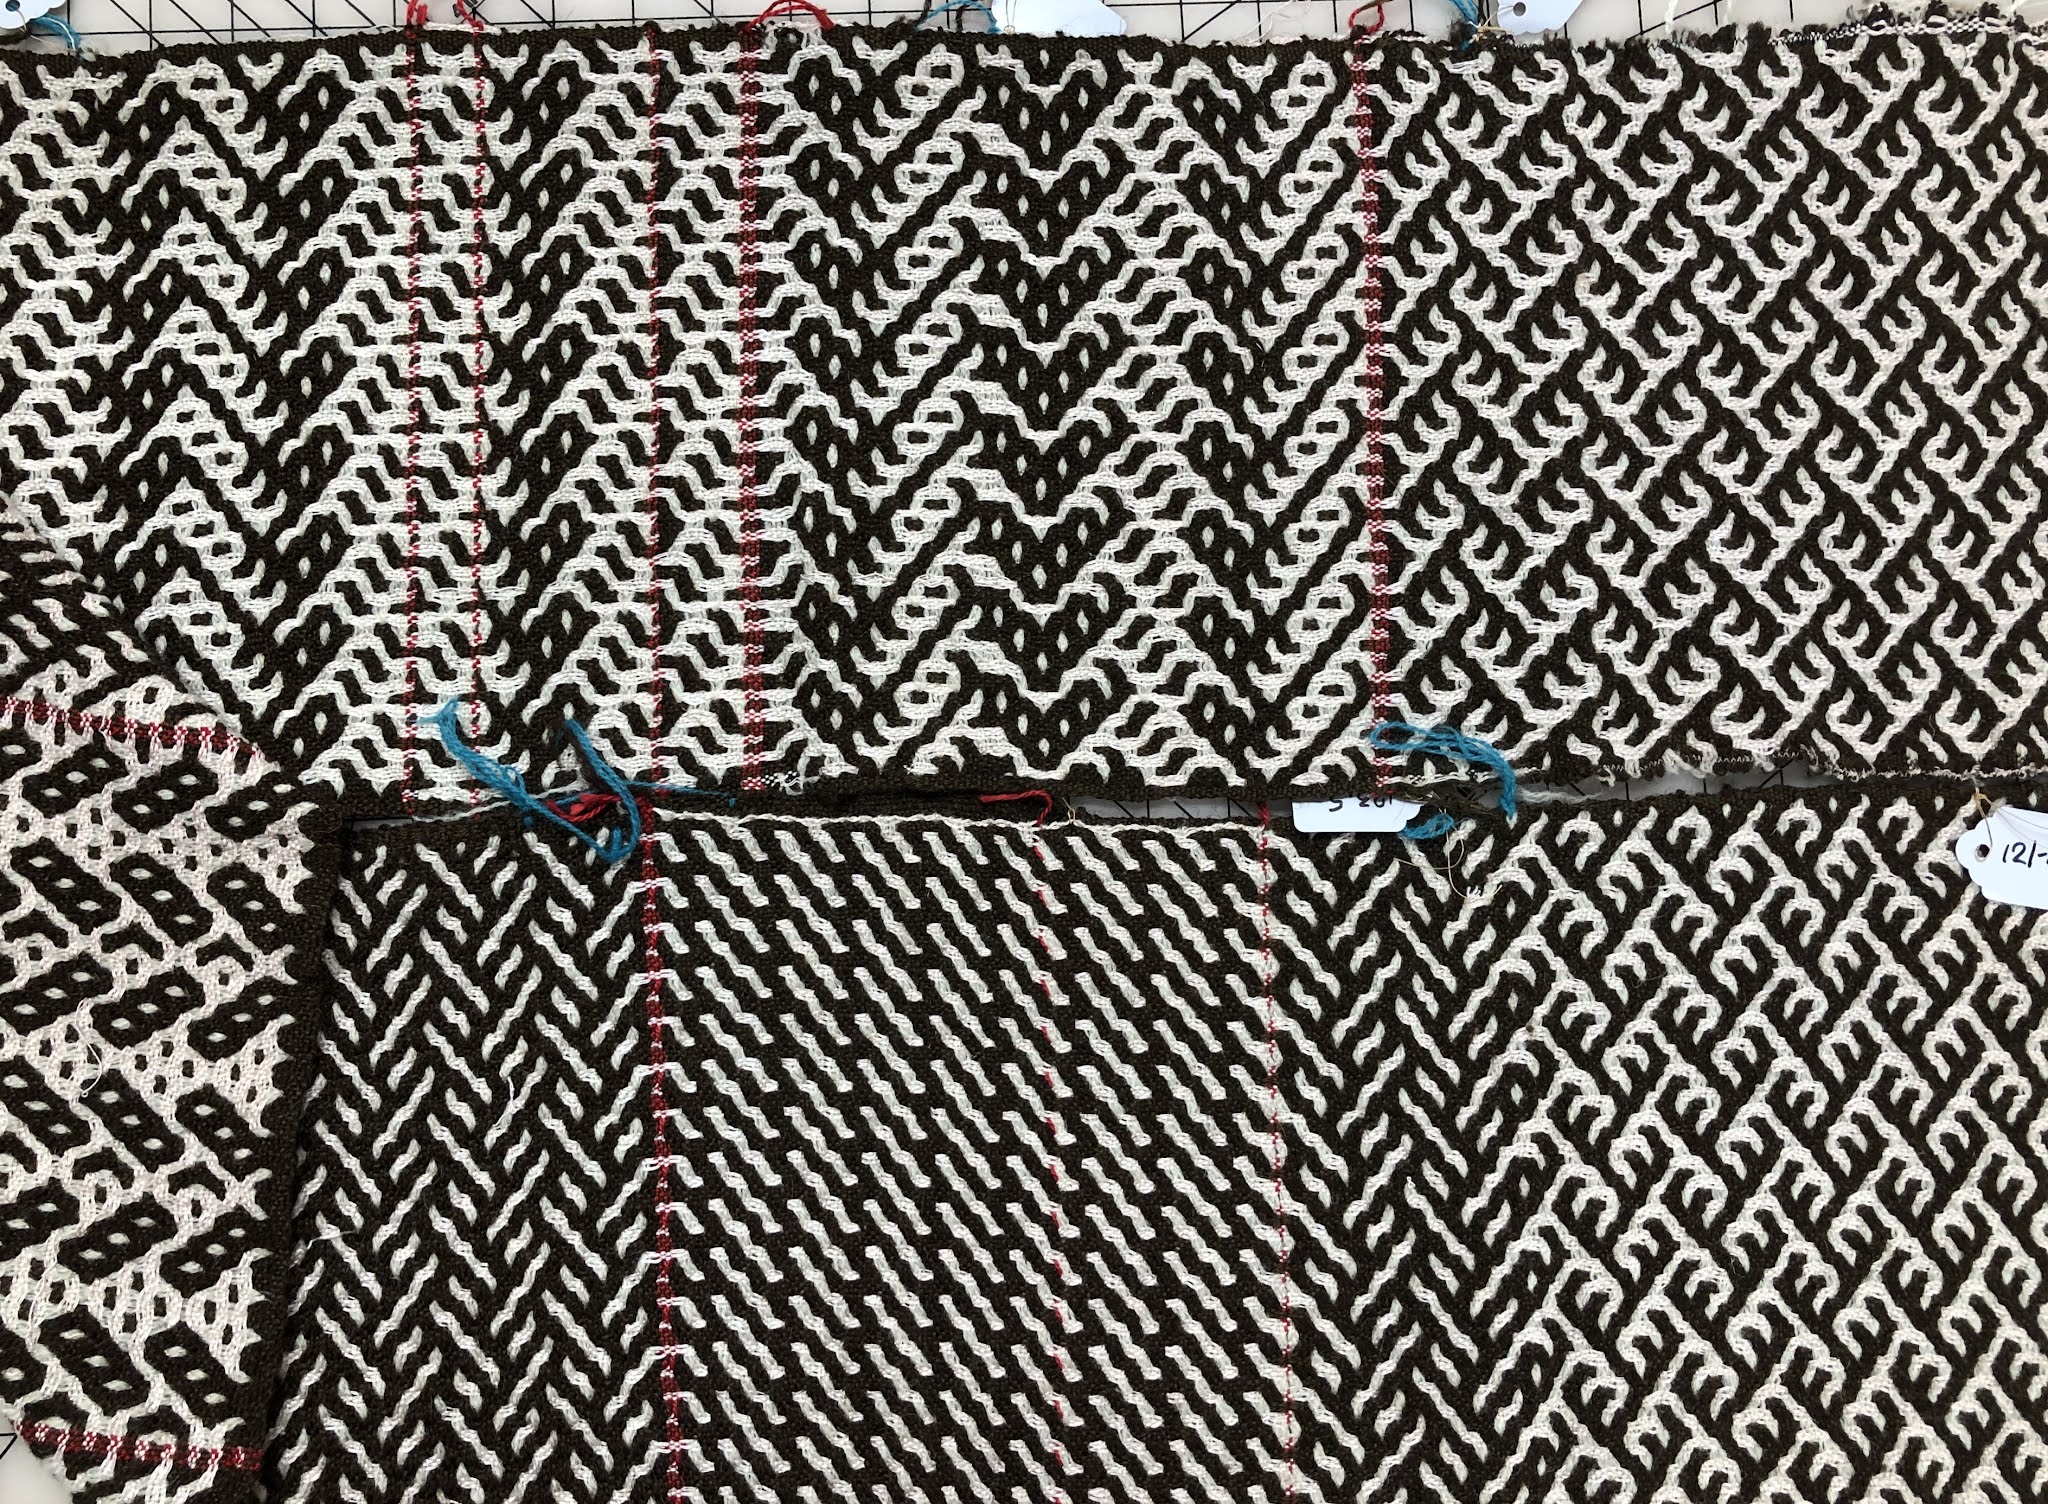
The workshop was a round robin, which means that each participant weaves on each of the prepared looms. Each person brings a loom with a different warp and threading (and tie-up with a floor loom) that have been assigned by the instructor. In the class, everyone takes a turn weaving on each loom and labels his or her section. (The labels are visible in the photo of student samples below.) At the end of the workshop, the samples are cut apart and each weaver leaves with a sample of each the weaves.

Although some techniques are possible with on 4-shaft, eight-shafts is really the jumping off point for exploration. This workshop was for 8- or more shafts. My table loom has 8-shafts, as did most of the looms in the workshop.

I came home with a nice sample book--and with plans to weave some of them. Some really aren't practical for me. Even though I have a 12-shaft loom, patterns with very long treadling patterns would be all but impossible with my limited number of dobby bars on a strictly mechanical dobby loom.
Student samples: (L) Complex doubleweave. Note the difference in color effect on the sample in the middle. (R) Echo twill weave

Wednesday, June 14, 2017

Sharing love and history

Kids love the beating part of rug weaving

Weaving through a historical lens

If you have ever spun or woven in public, you know that there is little to no understanding of either craft among the general public.

Not unlike the lack of connection between farm production and supermarket displays, the public in general has little to no concept of fabric construction. Industrialization separates us from understanding some of the essential building blocks of humankind.

I recently spent a day weaving at Walnford Day at Monmouth County Park System's Historic Walnford House in Upper Freehold, N.J. That's somewhat of a misnomer as I spent most of the time talking about historical precedent, how and why weaving was important to colonials, and helping the public, many of them children, weave a few shots. It was a really good day and I loved it. 

Newcomb/Sears Fairloom back view/sectional beam
There is no evidence that the owners of the Walnford property owned looms or wove themselves, they operated a fulling mill along with a grist mill and lumber mill, so it is safe to say that there were plenty of weavers in the area.

Historic Walnford has three operating looms that have been gifted to the property, none of which is period. The vintage Sears Fairloom, which was made and sold by Newcomb Loom Company as its Studio Art loom, is warped to weave rag rugs and used for education and sampling by the public. 
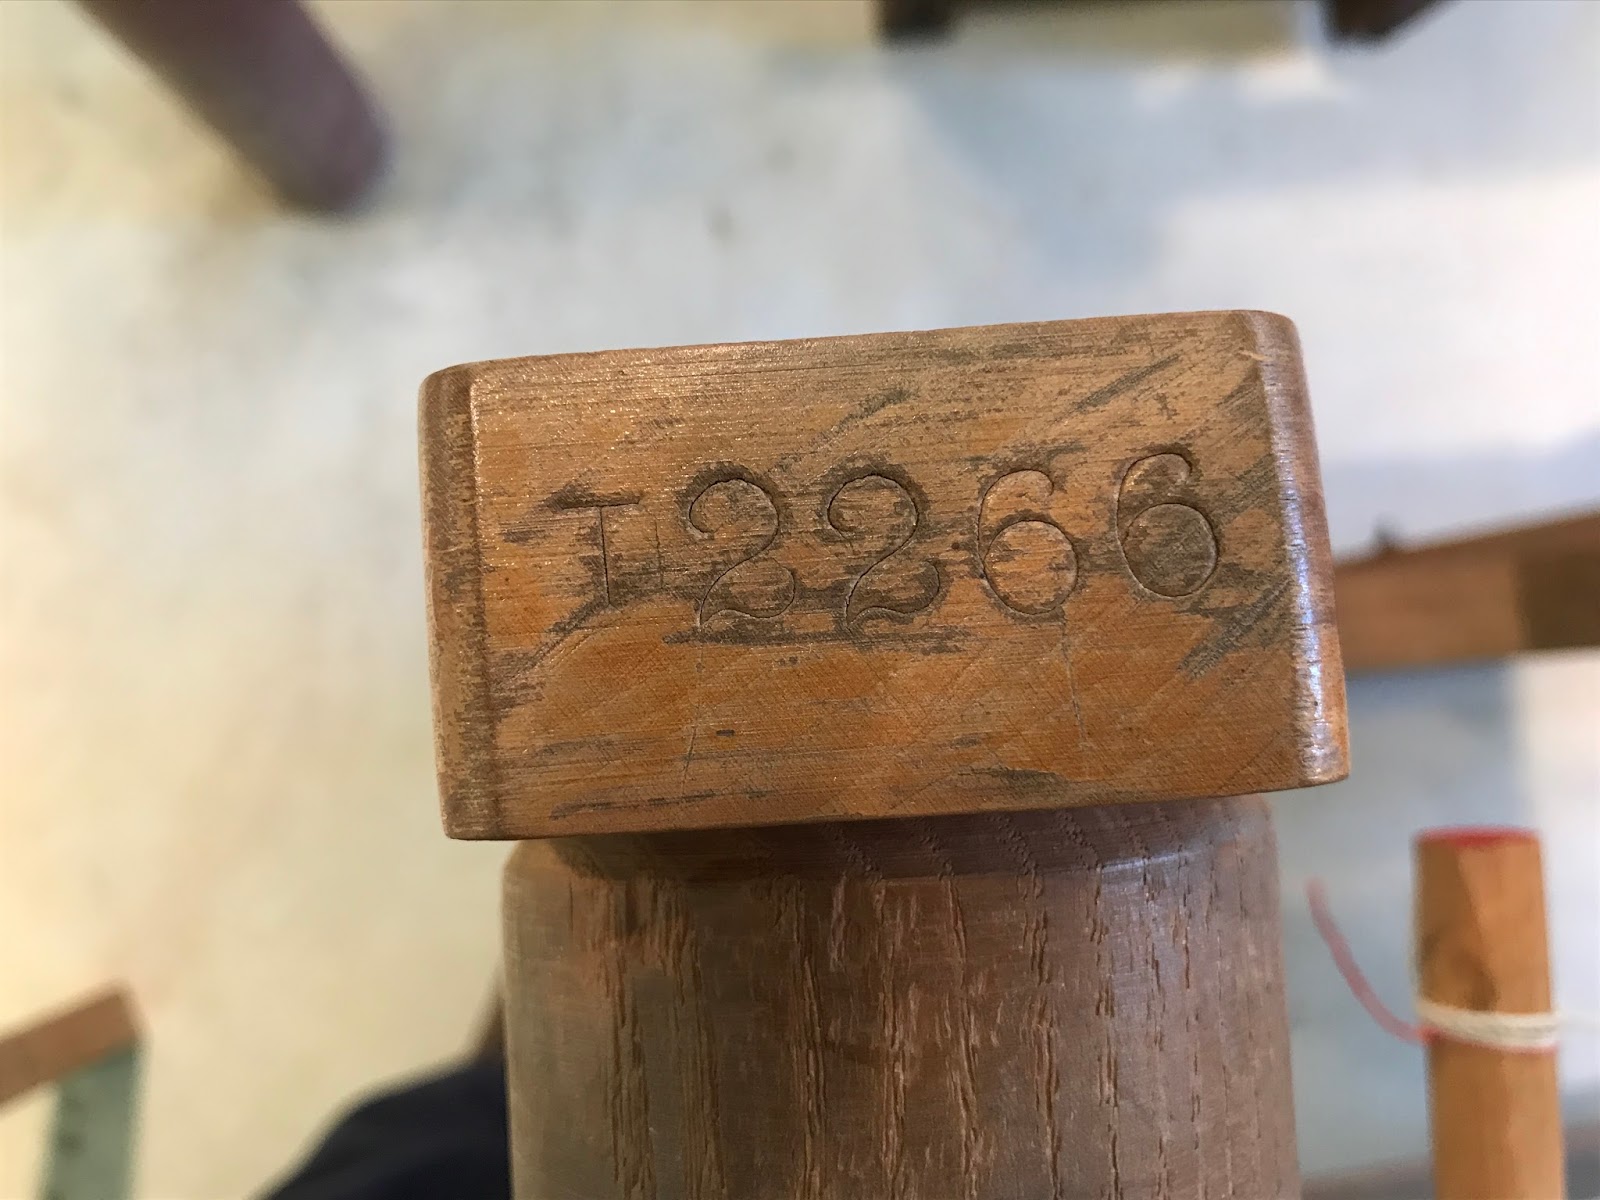
Newcomb identification number
Although the Newcomb Loom Company, which was established in Davenport, Iowa in 1889, ceased operations in the 1980's, Newcomb looms are still being used by weavers. If you have one, you can add it to the registry hosted by Weaver's Delight for a very modest fee, find parts and order a copy of the original instruction manual.
For Walnford Day, it was a time to introduce people to the frugality of former times. I took along strips of cotton fabric for the rag rugs and they served as a great conversation starter. As I talked about colonialists' frugality and how they repurposed as much as possible, I asked what they thought the fabric was from. (It was from an old bed sheet.) Surprising even to me was how many people didn't even know where to start. 


No fancy dress, thank you

Dressing in period costume was not required for the day. I don't have costume, so obviously, I didn't. But some presenters did. The spinner, for example, had a lovely outfit complete with a charming little hat set sideways just so. And it got me thinking about period costumes for history days like this. 

Here is my problem: Spinners and weavers don't dress in lovely outfits to perform their work now--and they never did. They need to move. They're engaging in physical labor. Weavers, even more than spinners, need to throw shuttles (long sleeves would interfere) and to crawl under the loom (unless they're production and have a loom boy, i.e., child labor). These are not jobs for ladies sitting in parlors with an embroidery hoop.

The dressing up in Sunday bests for the middle and upper-classes is colorful and fun, but it does not convey the hard lives that most people lived.

If I were dressing to weave or spin in a historical context, I'd wear a coarse cotton or cotton and linen shift-style dress in a natural color. If a head covering were needed, it would be a simple scarf.

Tuesday, June 6, 2017

Show and Tell

Inspiration, ideas and know-how
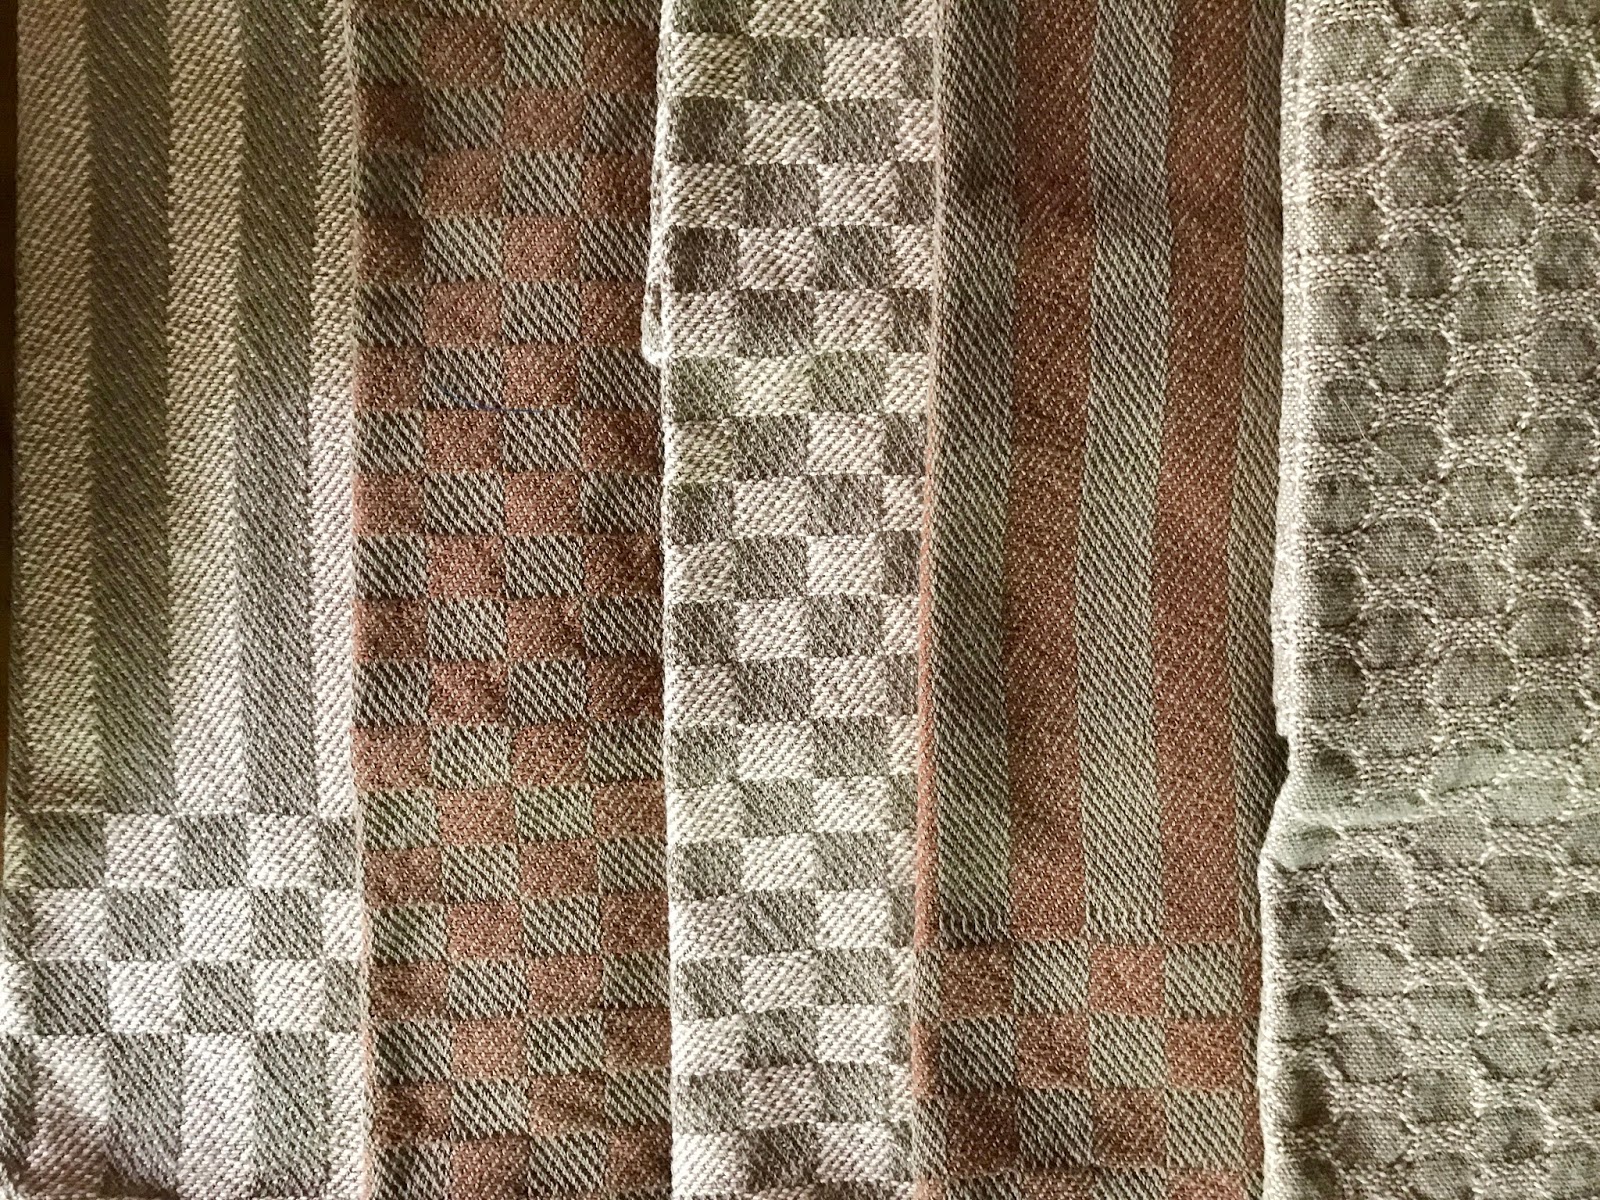
Five multi-harness twill tea towels

When fiber artists share their work, it's a bonanza for everyone. Over the past year, the weavers' study group in the South Jersey Guild of Spinners and Handweavers wove towels as a project. The object, I learned too late, was to use a draft such as huck or M's and O's. 

As I see it, there are two major upsides to show-and-tells. The most valuable is sharing knowledge and experience when fiber artists discuss not only what they made, but they made it. It's the time to talk about the surprises and the disappointments that inevitably accompany the creative process.


Color insight

At this sharing session, one weaver discussed the diluted color effect in her towels. On the bobbin, the reds and greens were bright, but when surrounded by neutral colors in the double-faced honeycomb weave, they are significantly subdued.
to a softened green--all in the weave
From bright kelly green.....

My project work is visible in the two stacks of towels to the left of the large basket in the center of the photo. I shared my project work earlier this year in my "Tea Towels" blog, but after weaving six towels, I had cotton left over. So I warped it on and wove more towels. I not only had fun weaving five more multi-harness twill weave towels (closeup: above, right) them, I was getting better acquainted with my new-to-me vintage loom and working out its strengths and weaknesses.


Diversity in Show-and-Tell items
As the name of the guild implies, not everyone is a weaver in the group and the shares included knitted items, a latch-hooked wall hanging, baskets and fractal spun yarn.


Handspun 'fractal' yarn 
Latch hooked project


Thursday, April 13, 2017

Shuttle talk

Finding the shuttle that's 'just right'

Schacht end-feed shuttle w/tension device
First there were LeClerc boat shuttles with bobbins and paper quills, mainly because my first loom was a LeClerc. More recently, along came a Bluster Bay traditional end-feed boat shuttle with hook-and-eye tensioner. Then came an Ahrehns & Violette (now Chico, Calif.-based AVL) end-feed tensioned shuttle along with the AVL 12-shaft dobby loom. 


Above: AVL tensioned end feed shuttle. ca.1981 w/pirns
Below: Boat shuttle w/paper quill
I was recently weaving cotton towels for a guild project on the new dobby loom. As I was evaluating the loom, I also began experimenting with the two end-feed shuttles. The 15" AVL, which was almost certainly made for the loom (They share the same inventory number from FIT), works beautifully, but feels too big and too heavy in my hand and for the 34' dobby loom. 


Above: Bluster Bay end-feed shuttle w/hooks and eye
Below: Boat shuttle with bobbin
I swapped out the AVL shuttle for the 11" Bluster Bay shuttle. Nice. These are beautiful shuttles. The quality of workmanship is excellent and they are a pleasure to work with. But I found threading the hooks and eye very fiddly and hard to replicate if I lost the end of the prior pirn's thread. Its size also felt a tad small, but the difference in weight  with the AVL may have contributed to that conclusion. (See weight comparisons below.)

I was using two colors for some of the towels and that gave me a good opportunity to evaluate the shuttles against each other. 

Ideally, I'd want two shuttles of the same weight and balance for a project--and the end-feed shuttles I had were too different to pair. So, I tried using a traditional boat shuttle and bobbin with the Bluster Bay, only to be reminded how much I hated the rolling bobbins that either pay out excess weft or hold onto it so tightly it pulls the selvedge too often. A paper quill was better, but couldn't replicate the selvedges of the Bluster Bay. 

I longed for the 'just right' end-feed shuttle.


Path to purchase

I had purchased my first end-feed shuttle--the Bluster Bay--at a conference on recommendations from others, but hadn't really researched available products. I love the shuttle, but cost is always a consideration. Much as I love working with the elegant shuttle, the cost for shuttle with a metal tensioning device is one-third to one-half again the cost of other brands. 

I needed more information. I weighed my shuttles--with and without pirns--and collected  specifications for end-feed shuttles with metal tensioning devices on the market. Then I  consulted with weavers on Weavolution, where there had been a lengthy discussion a few years ago on the topic. 
Schacht end-feed tensioning device, detail
After listening to what others had to say about their experiences, I balanced what I needed against cost. I bought a 12 inch Schacht end-feed shuttle.

I have been using my new shuttle and I love it. It's not as beautiful in the hand, but i's a snap to thread (no hook needed!) and the metal tensioning  pads are easily adjustable. 

No, I don't have a matched pair, but the Bluster Bay and the Schacht work pretty well together. At least for now. 


And now I have only myself to blame if my selvedges are less than nice.


Here are some specs used in my decision-making process. 
Specifications
Ahrehns & Violette 
(Chico, California)
Bluster Bay
(Sandpoint, Idaho)
Schacht
(Boulder, Colorado)
Length 15 inches 11 inches 12 inches
Type pirn Wood Cardboard Wood
Weight (with/without pirn) 7.8 oz/5.8 oz 3.7 oz/3.8 oz 4.8 oz/5.4 oz
Tension type Metal tensioning pads Hook and Eye Metal tensioning pads

Note: End-feed shuttles require pirns to match. 

Wednesday, April 5, 2017

Sharing love of fiber


Tabby, kilim slits, rya knots, and
shaping techniques

Teaching as an art form 

Although the subjects have varied over the years, the rewards of sharing knowledge never cease to give me joy. Thanks to The ARTerya new arts-focused business that has just opened in Medford village, I am now looking forward to sharing my love of threads.

One of my classes will focus on weaving a small wall hanging. Participants will learn basic tapestry techniques and leave with a unique 'wall art' ready to hang.

The classes, which are project-oriented, target those with interest, but with little to no knowledge or experience. As it's a near certainty that prospective students don't have equipment, the challenge is to get people interested with an inexpensive cost of entry.

In this case, the goal was to find an inexpensive table/lap loom. And The ARTery owner, Karen Walker, did just that! But before I taught with it, I wanted to work with it--find what it would do and what are its limitations. I ordered one from Target. 
Two types of dovetails with roving for dimension

The only real issue with it is that it needs glued together for stability. Another potential downside is that beginning weavers may be confused with two sets of visible threads as the loom is constructed to be warped around the loom length. (I'll take some cardboard to insert in the middle of the loom to cut down on distraction for new weavers.)

Glued up and ready to play

And play, I did. I had a ball! My goal was to develop projects that were easy to do and could be completed in two sessions--but varied enough to give people ideas. The yarns had to be forgiving and the techniques restricted to just a few simple processes. In addition to tabby, I wove examples with interlocking dovetail joins, kilim slits, rya knots, shaping and fringes.

The ARTery's grand opening is Saturday. The weavings are there now and I do look forward to teaching there!
Simple two-color tabby techniques
Variegated yarn effects


Tuesday, February 28, 2017

Tea time


When a project changed my mind

Six tea towels, three 12-harness patterns
I vowed I'd never knit socks or weave towels. I knit socks now so I suppose it was only a matter of time before I confronted my other 'never.' 

The project this year for the South Jersey Guild weaver's study group is....you guessed it. Tea towels.  

I admit to being somewhat disappointed, but wanted to support the initiative. I wasn't exactly unenthusiastic, but I didn't want to spend a lot of money on yarn, either. I looked for the best value--and found one pound cones of 8/2 unmercerized cotton offered by The Lunatic Fringe. (I was unaware of the company until seeing their participation in the upcoming MidAtlantic Fiber Association's 2017 conference this summer in Millersville, Pa.) I ordered three cones.

Towel #1. 12-harness pattern, Ryall pg.364, no.4

Confession

I now admit it. I enjoyed the entire process--from planning through to the finished towels. The colors--peach, molasses and stone--weren't my first colorway choice, but they work just fine together. And I am reminded: They were 'good value.'

Towels #2 and 3. 12-harness, Ryall, pg.363, no.3.
Upper: stone weft; lower, peach weft
As this would be the first project on my new-to-me 12-harness Ahren's & Violette Loom, I wanted to put all the harnesses in action. Planning for six towels, I warped a six yard length in  alternating colors of peach and molasses and dressed the loom with a straight-12 threading sleyed at 24 ends per inch. I had 400 threads (including two threads for floating selvedges each side) and a 16 inch width in the reed.  

Using a sampler in my personal library that I'd woven based on a series of tie-ups from Pierre Ryall's Weaving Techniques for the Multiple-Harness Loom as a starting point, I began to play with peg patterns (tie-ups) and color on the loom. (Ryall is a classic resource for owners of multi-shaft looms.)

Patterns that work--or don't

Towels #4, 5, 6. 12-harness, Ryall. pg. 363, no.4
Upper: peach weft. Middle: stone weft.
Lower: peach, 
stone and molasses check
As I began to weave the first towel, it was very clear very quickly that the pattern that worked well with different colors on my sampler got lost in the two-color warp. So I  wove it as an evenly-balanced check in the same colors as the warp. It will dry a dish just fine but the pattern is definitely 'meh.'

Much more effective are the two twill variations. Towels two and three were a simple straight twill (Ryall, pg.363, no.3). Four, five and six were based on an advancing twill with wefts in warp or a third color. (Ryall, pg.363, no.4)

The effects of varied weft colors is a reminder how much different colors change the look and feel of the fabric. 

After weaving six towels, I wanted to see how far I could weave to the back bar, so I kept weaving. I cut off the warp with only 12 inches of loom waste on the back end and now have a tray cloth, too!

I was particularly pleased with the towels after washing and drying them. They don't really need to be ironed!

After weaving the six towels, I have about one and a half pounds of cotton left. I think I'll make a warp and....weave some more tea towels.

Wednesday, February 8, 2017

Getting to know you

How the loom works and key takeaways

Hand towels woven on the AVL
You may recall the "new" loom that came into my life late last fall. Although new to me, it is not new. As the 129th loom made by AVL, it is a 12-harness dobby loom that dates to the early 1980's. 

I must admit that I was a little awed by the loom and tried to find out everything I could about dobby looms. I did online research and bought some books. In some respects, the descriptions made it sound more difficult to set up than it is. (Please note: I am not talking about the construction of the loom.)

Dobby bars showing pegs and holes
My personal conclusion is that setting up to weave is simply a matter of rethinking the process. I got a little bogged down with how to peg the dobby bars. But it is very straightforward. Pegging the bars is like manually operating the levers on a table loom. They're either pegged--or not--and the harnesses either lift--or not.

For me, pegging the bar with the small metal pins was a bit counter-intuitive. A peg keeps the harness from lifting and no peg, i.e., a hole, lifts the harness. So, if I want harnesses 2, 4, 6, 8, 10, and 12 to raise, I peg the holes in 1, 3, 5, 7, 9, and 11.

Dobby bars on dobby head
Pegging the dobby bars also made me think about how they entered the wheel. If I pegged the bars from top to bottom and inserted them onto the dobby head, my lift plan was reversed because the bars enter the mechanism from the back. Pegging from bottom to top is the right way to peg them.

My dobby bars are worn and some of the holes are stripped. For the most part, I can feel it through the peg wrench when I screw the pegs in, but not always. I haven't found them all yet so I need to carefully watch the shed and the pattern when weaving as pegs fall out. 

Painter's masking tape and 4 inch cable ties are my new best friends. I use the masking tape to wrap the pegs for the stripped holes, to mark the beginning of the lift plan sequence on the dobby bars and to mark harnesses. The cable ties I use to connect the dobby bars, which were originally connected with metal rings.

Key take-aways for my loom at this point in time:

  • Pegging and assembling the dobby bars 
    • "No peg," that is, a hole in the bar, lifts a harness.
      • Peg the bar for harnesses that should remain in place, that is, don't lift.
    • Watch for stripped holes and use tape (or the equivalent) to wrap the pegs.
    • Peg from the bottom of the dobby bar set to the top. (The AVL manual recommends a set of 20 bars minimum.)
    • Mark the first bar of the pattern weave with a small piece of tape. It's easy to get them out of order. 
    • If the pattern is not balanced, e.g., 6 and 6, peg the harnesses with the greater number of  lifts. This may put the pattern on the reverse, but it is much easier to weave.
    • Connect the chain of dobby bars with cable ties so that the connection is on the back of the bars. When joined from the front, the connector can interfere with the pattern.
  • Weaving
    • Until I am confident that my pegging is correct and the pegs are secure, I need to pay close attention to the lifted harnesses. 
      • I use a small piece of tape to mark the even-numbered harnesses so I can very quickly see whether the correct ones are lifted--or not.
      Rachet that advances dobby bars
    • My dobby mechanism does not reverse. I can disengage the dobby head, but most times it's easier to advance to the next sequence. (Tape on the bars also useful here.)

At this point, my big-picture conclusion is that although the mechanism and construction of my dobby loom is definitely more complex and very different from jack, counter-marche and counterbalance looms, it's not difficult. It's only a different way of looking at the set-up.




Tuesday, December 13, 2016

Pegs and bars

12-harness broken twill sample on a dobby loom

and a dobby loom

My new old pre-AVL loom is a real gem. This12-harness dobby loom is compact and also known as the Witch Loom and the Original Folding Loom. If you missed the story of the 'find of my weaverly life,' it's here. But that story ended with the loom in the door and I promised updates so here goes. 

That first evening, our first reaction was to call in a knowledgable AVL friend, but by the time Monday rolled around, the beast wasn't looking so daunting. 

I had ordered some resources--Hand Weaving and Cloth Design, by Marianne Straub; Handloom Weaving Technology, by Allen Fannin; and Bonnie Inouye's PDF revision to the first part of her out-of-print book, Exploring Multishaft Design--to help me understand the mechanism and awaited deliveries. 


Some minor mechanical issues emerged but almost all of them were related to the disuse. There was a light rust film on the metal parts and they didn't move smoothly. I cleaned  the dobby fingers and other metal parts with a very light, non-petroleum-based oil and added some graphite to the sliding metal frame on the dobby mechanism. 


Ready to weave

When the peg wrench I'd ordered from AVL arrived, I was ready to peg bars and begin weaving!

I put on a warp, pegged some bars for tabby, and started weaving. This was key to my understanding the loom and how it worked. And it was key to seeing what was simply frozen from sitting and what needed fixed.

As I wove, I found that the Texsolv heddles grabbed and didn't slide smoothly on the harnesses. The heddles maintain the harnesses in position but need to move a little, too, so I lightly waxed the harnesses. Problem solved.

Mostly, it was me that needed to become familiar with my loom and how to make it work for me. My main challenges were how to attach the raddle and where best to sit when threading the heddles. But these challenges aren't unique. They're true for any newly acquired loom.

Dobby with bars pegged for a twill weave
Feeling more confident about the mechanics, my next goal was to figure out how to change the dobby bars more easily. They load from the back underside and I found them fiddly. I may be missing some basic know-how, but still haven't found it. I now use a nylon cord to wrap around the first bar to hold it in a depression until I could move it into working position. 

The original dobby bars use metal rings for connections. This requires needle-nosed pliers to connect bars and change configurations. M solved the connection issue with little cable ties. Perfect. Easy to put on and easy to snip off with scissors. (Visible at right between the first bar at the top and the second.)

I am loving weaving on this little gem and look forward to more exploration of multi-harness weaves! The South Jersey Guild has a study program this year--so there will be more about weaving to come.